New in H2R Gear v2.13
Draw the room around your gear with new shapes, symbols and a drawing toolbar.
Read more →New in H2R Gear v2.13
Draw the room around your gear with new shapes, symbols and a drawing toolbar.
Read more →By John Barker • 8 September 2026
A stage plot is a top-down drawing of the stage that shows where everyone and everything goes: musicians, instruments, amps, microphones, monitors, DI boxes and power. It is usually one page, and it is usually the first thing a venue’s sound engineer looks at when you send your details.
A good stage plot means the stage is mostly set before you arrive. A missing or confusing one means a slow changeover, monitors in the wrong place and a stressed engineer at the start of your set.
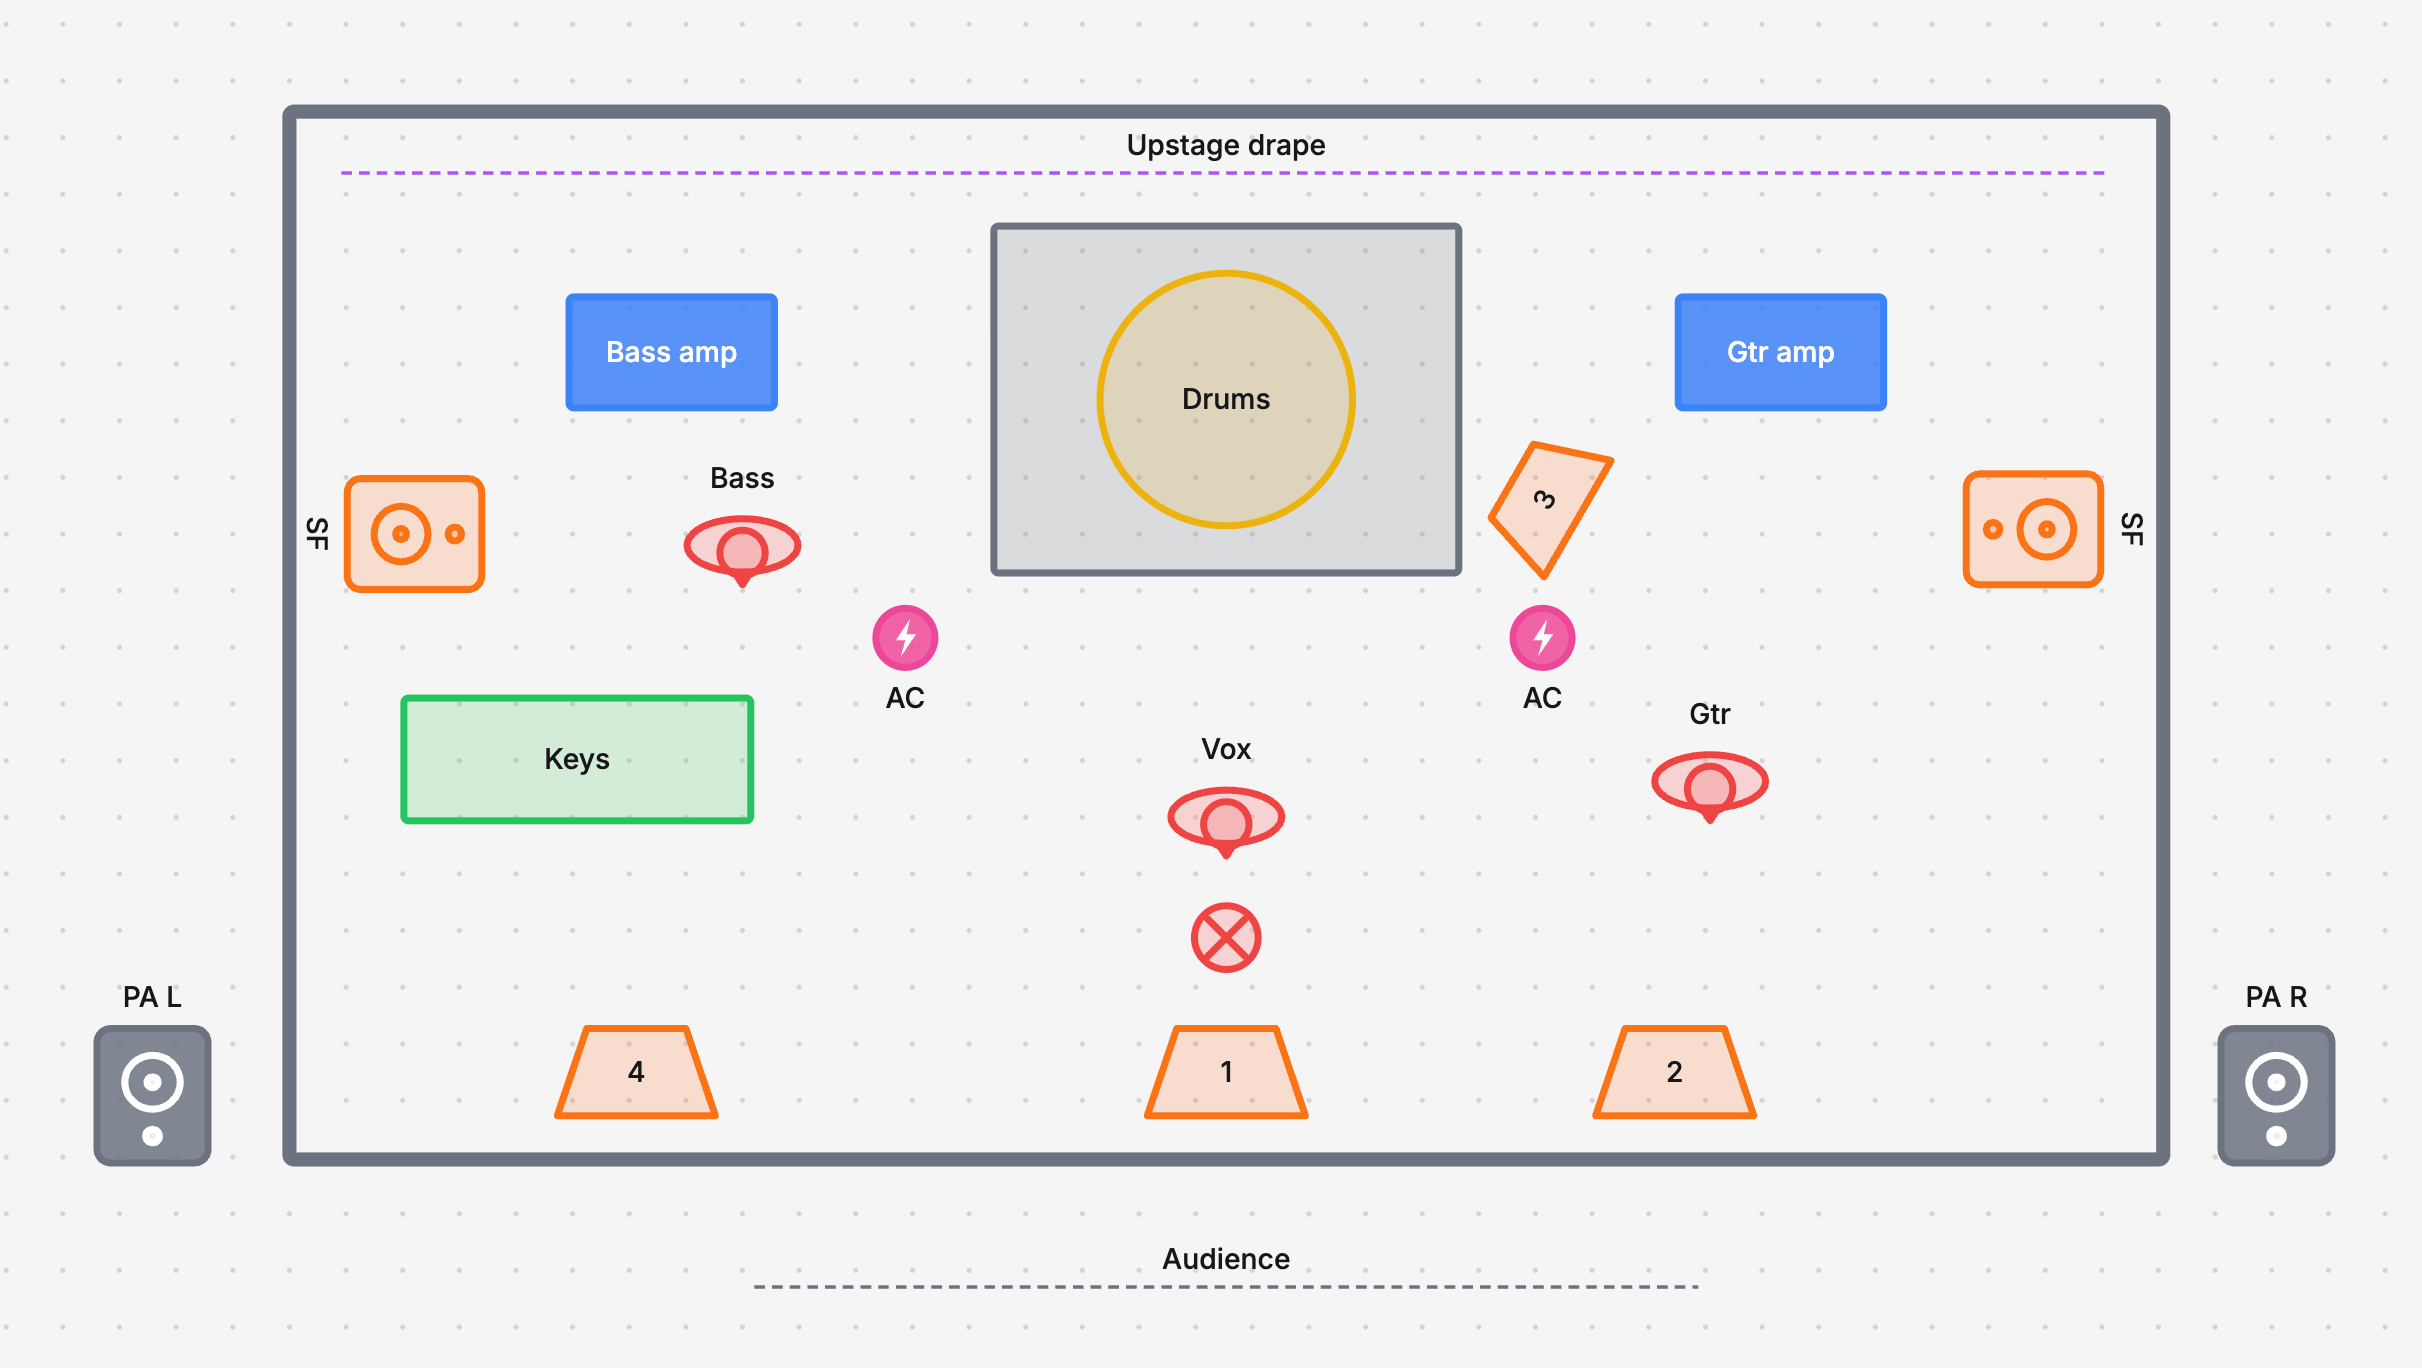
Keep it simple. The engineer wants to know where things go, not what brand of guitar strings you use.
Things that usually do not belong on the plot: the full input list (that is a separate page, see how to make an input list), detailed lighting cues, and hospitality requests.
Put the audience at the bottom of the page and upstage at the top. Stage left and stage right are from the performer’s point of view, which confuses everyone, so label “Audience” clearly and the engineer will read it correctly.
A mic symbol means nothing on its own. Label it “Vox 1”, “Kick” or “Gtr amp”. The same goes for monitors: number them to match your monitor mixes.
You do not need an architect’s drawing, but proportions help. A drum riser drawn the same size as a vocal mic makes it hard to judge spacing.
Colour helps group things, for example blue for backline, orange for monitors and red for mics. Just make sure it still reads if someone prints it in black and white.
If it does not fit on one page, it is trying to do too much. Split the input list and the technical notes into their own pages.
H2R Gear is free to use and its drawing tools are free on every plan. Open a plan and use Add › Drawing tools to lay out your stage:
Press Shift+D to keep the drawing toolbar open while you work.
Because it is a plan in H2R Gear, the same document can also hold your real gear and the cables between it. Add your mixer, stage box and DIs, connect them, and you have a stage plot, a wiring diagram and a packlist in one place.
Before you send it:
Then put it in your technical rider alongside your input list, and you are ready to send it to the venue.
Ready to get organised?
Start using H2R Gear to plan your next setup.
Get H2R Gear product updates
New features, templates and tips, straight to your inbox.
No spam. Unsubscribe any time.