
New in H2R Gear v2.13
Draw the room around your gear with new shapes, symbols and a drawing toolbar.
Read more →New in H2R Gear v2.13
Draw the room around your gear with new shapes, symbols and a drawing toolbar.
Read more →By John Barker • 15 March 2026
You can have the best switcher money can buy, but if it lives in a messy rack with a fan blocked by a coiled HDMI cable, you have built a problem rather than a system. A good rack is invisible. It hums quietly in the corner, never gets too hot, and lets you swap a faulty unit in five minutes without dismantling everything around it.
Here are nine practices that separate a rack that earns its money from one that causes overtime.
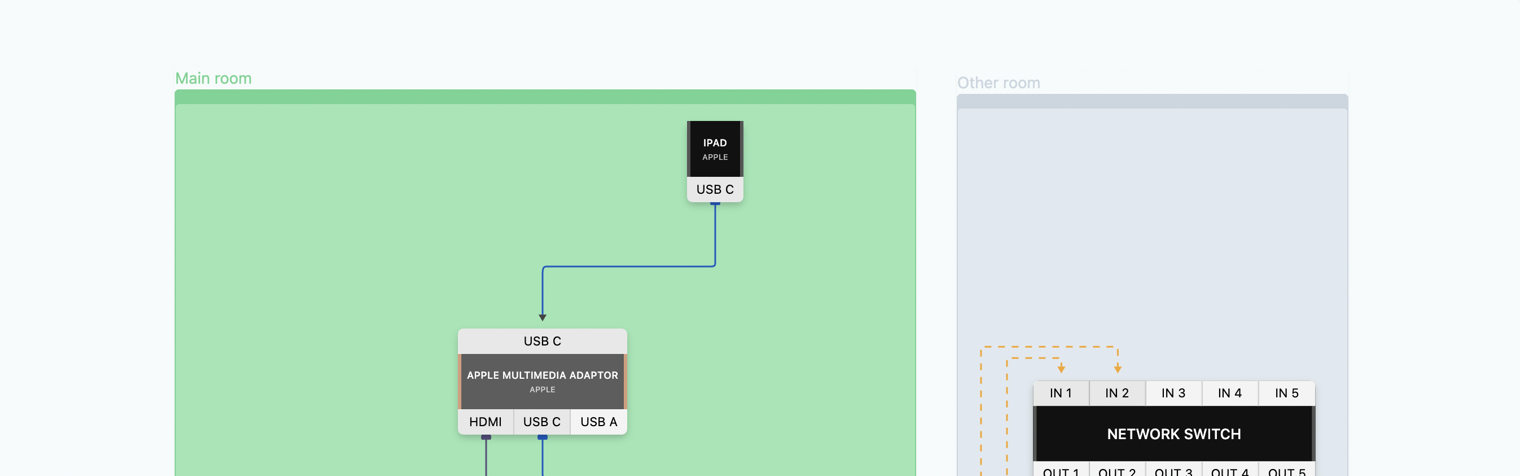
Before you turn a single screw, draw the rack. Decide which units go where, which way they face, where the patch panels live and how cables flow between them.
Drawing first catches the classic mistakes. The amp that needs to be at the bottom because of weight. The unit you forgot is two rack units tall, not one. The patch panel that has to live next to the switcher because the cables are pre-made and too short. Five minutes of planning saves an afternoon of unmounting and remounting gear.
Mount the heaviest gear (amps, power conditioners, UPSes) at the bottom of the rack. Two reasons. First, the centre of gravity stays low so the rack does not become a tipping hazard during load-in. Second, when a 30kg amp inevitably has to come out for service, you are not lifting it over your head.
Keep audio in one section, video in another, network and control in a third. This is not about aesthetics. It is about preventing interference between unbalanced audio and high-current power, and making troubleshooting orders of magnitude faster. If every audio cable runs in a known column, a single glance tells you whether something is in the wrong place.
Every two or three rack units of active gear, leave a 1U vent or blank. Air needs to move. The unit you do not leave a gap above is the unit that runs hot, throttles, and dies a year early. Power amps and high-density switchers especially need clearance around their intakes.
Plug nothing directly into the back of an expensive piece of gear if you can avoid it. Use patch panels for audio, video and network so that all the connections you ever touch live on the front of the rack.
This single decision saves your inputs and outputs from wear, makes troubleshooting fast, and means you never crawl behind a 600mm-deep rack to reseat a BNC. Buy more patch panels than you think you need.
Every cable in the rack should have a small service loop, a couple of inches of slack neatly looped and tied off. This lets you slide a unit forward to work on it without disconnecting half the back of the rack. Cables that are pulled tight and dressed perfectly look great on day one and become a nightmare the first time you have to service anything.
Every cable, both ends. Heat shrink with a printed label is best. A wrap of gaffer tape with a Sharpie label is fine. No label at all is asking for trouble. The convention does not matter as much as having one. “FOH-1 → DESK ch12” beats “the one with the blue tape on it” every time.
For more on this, see our guide to cable labelling for live events.
Put a rack-mount power distribution unit at the back, ideally a model with surge protection and remote sequencing. Plan which devices share which circuit, balance the load across phases if you are on three-phase, and make sure delicate gear powers up after the amps so you do not get a thump through the PA every time the rack starts.
A 20A circuit should not run more than about 16A continuously. Add up the rated draw of everything in the rack and check you have headroom.
Once the rack is finished, draw it. Take photos of the front and the back. Write down which circuit feeds which strip, which patch points go where, and which firmware versions are loaded. Store all of this somewhere that is not just on the lead tech’s laptop.
Future-you and every freelancer who ever opens the back of that rack will thank you. The hour spent documenting saves days of confusion later, especially when the original builder has moved on.
A rack is one piece of the wider show. In H2R Gear you can place each rack as a zone on your plan, drop the gear into it, and wire it to the rest of your setup. The cable key tells you exactly how many of each cable type live in or come out of the rack, which makes pre-build orders and patch lists much easier.
If you build racks for a living, or you maintain a flying pack for tours, having the whole signal chain laid out alongside the rack itself is what stops the “wait, where does this one go?” moments on site.
For more on grouping gear with zones, see the zones documentation.
Ready to get organised?
Start using H2R Gear to plan your next setup.
Get H2R Gear product updates
New features, templates and tips, straight to your inbox.
No spam. Unsubscribe any time.