New in H2R Gear v2.13
Draw the room around your gear with new shapes, symbols and a drawing toolbar.
Read more →New in H2R Gear v2.13
Draw the room around your gear with new shapes, symbols and a drawing toolbar.
Read more →By John Barker • 13 April 2026
Every cable on a show has two ends. One end is usually behind a piece of gear, the other is somewhere across the room, the stage, or the truck. Without a label, the only way to know which end you are holding is to follow the cable. That is fine for one cable. It is a nightmare for forty.
A good labelling system is how you set up faster, troubleshoot in seconds and load out without leaving cables behind. Here is a working system that has survived hundreds of shows.
Three options, in order of how much show day they survive:
Almost every working pro keeps a label printer in the office and a roll of gaffer tape in the case. The printer is for the kit, the tape is for the venue.
A good label answers three questions: what is this, where does it come from, and where does it go.
For touring stock, label cables with at least:
For show-specific patching, label both ends of every cable with:
The destination on the source end, and the source on the destination end. That way wherever you pick up a cable, the label tells you where the other end goes.
Different cable types should look different at a glance. Sleeves, boots, gaffer tape, or coloured labels, the medium does not matter as much as the consistency.
A widely-used convention that crews already know:
You do not have to use these specific colours. Just pick a set, write them down somewhere, and apply them to every cable in your kit. Once you are consistent, you can spot a wrong cable type from across the room.
The biggest mistake in cable naming is using arbitrary numbers. “Cable 7” tells nobody anything. “FOH-VOX-1” tells everyone what it is for.
Build names from the things that matter to the show:
“STAGE-CAM-3-SDI” instantly tells you it is the SDI cable from stage camera 3. “MON-IEM-2” is the IEM feed to monitor position 2. No look-up required.
The single rule that catches people out. A cable labelled only at one end is half-labelled.
When the cable is unplugged at the desk and you need to know whether to keep it or coil it, the only way to find out is to walk to the other end. Multiply that by 40 cables and you have lost an hour of strike.
Both ends. Every time. No exceptions.
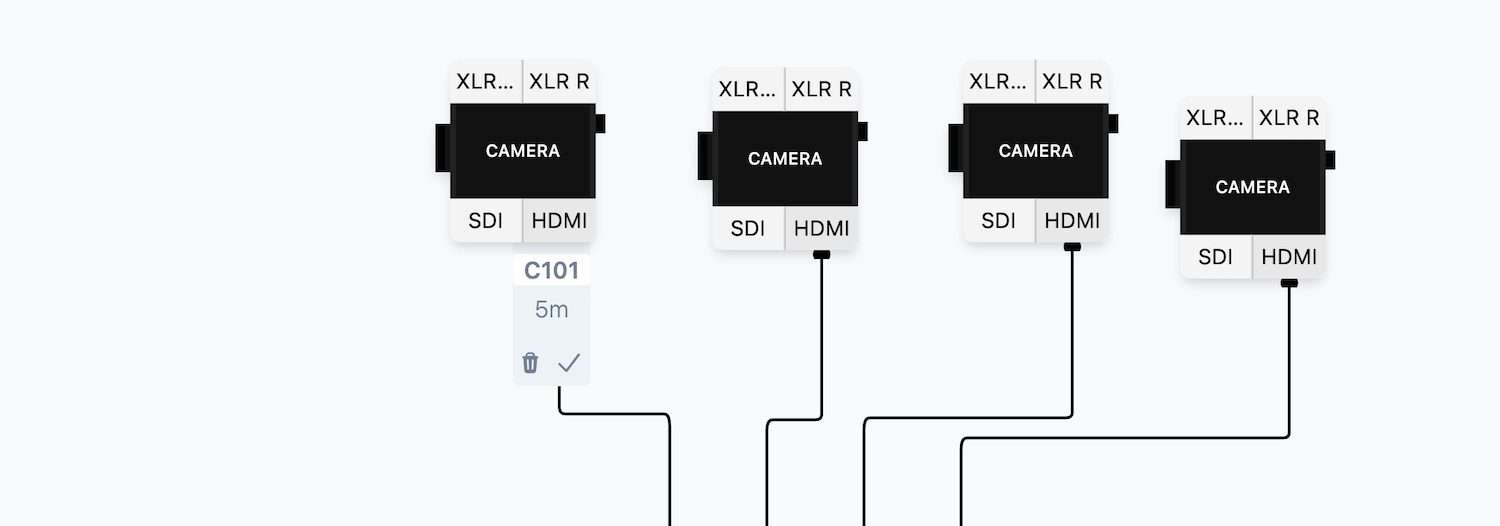
The most useful labelling system links the labels on the cable to the names in your plan. If your plan shows a cable called “CAM-1-SDI” running from camera 1 to the switcher, then the label on that physical cable says CAM-1-SDI.
H2R Gear lets you set IDs on every cable in a plan. The cable key on the side of the plan gives you a complete list of every cable, its type, its length and its ID, ready to print or export. Match the labels in the case to the IDs on the plan and the patch list becomes a one-to-one lookup.
For tours and resident installs, having the same naming live across the plan, the patch list, the labels and the documentation is what makes a five-person crew feel like a single brain.
For every cable you make or buy:
The two minutes you spend labelling are the twenty minutes you save the next time something breaks. That is a return on investment most shows never get.
For more on cable IDs and the cable key in H2R Gear, see the cables documentation.
Ready to get organised?
Start using H2R Gear to plan your next setup.
Get H2R Gear product updates
New features, templates and tips, straight to your inbox.
No spam. Unsubscribe any time.