New in H2R Gear v2.13
Draw the room around your gear with new shapes, symbols and a drawing toolbar.
Read more →New in H2R Gear v2.13
Draw the room around your gear with new shapes, symbols and a drawing toolbar.
Read more →By John Barker • 5 March 2026
A signal flow diagram shows how signals move through your gear. It is a picture of the system, drawn so that anyone walking up to it can trace a path from a microphone through the desk to the speaker, or from a camera through the switcher to the encoder.
It is not a rack drawing. It is not a wiring list. It sits in between, and it is the single most useful document on a complex show. Without one, every question becomes “where does this go?“. With one, every question becomes “look at the plan”.
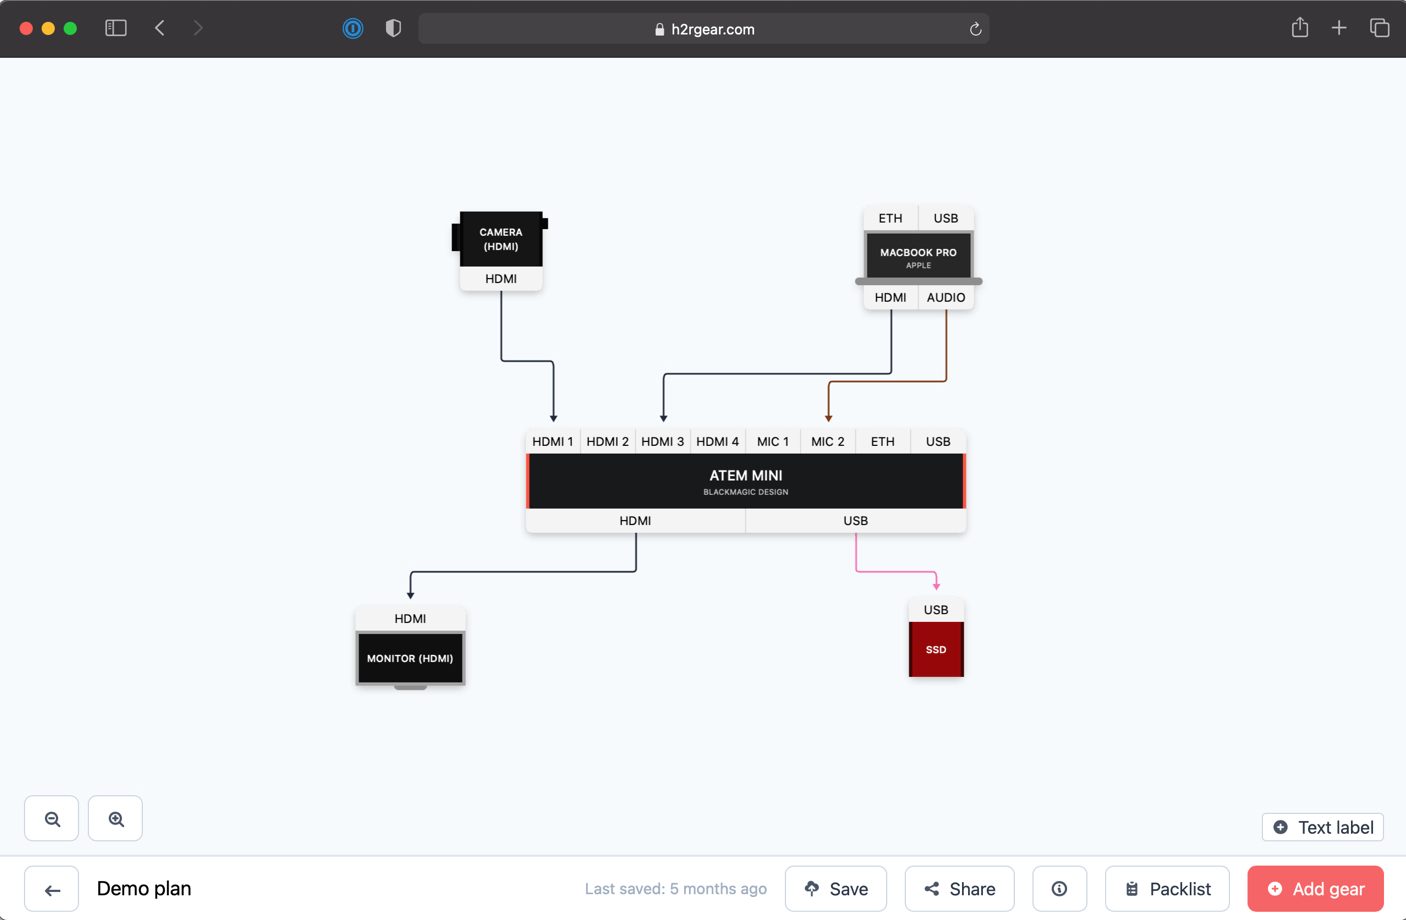
Three good reasons, all of them about saving time.
Planning. Drawing the system forces you to think about it. You spot the missing converter, the camera that does not have a power supply, the audio split the venue insisted on. Better to find these in the office than at load-in.
Communication. A diagram lets a freelance tech, a venue engineer or a client all see the same thing. “It is the third HDMI from the left on the back of the switcher” stops being a sentence anyone needs to say.
Troubleshooting. When something breaks mid-show, the diagram is what tells you where to start looking. No signal at the encoder? Trace back along the line, check each junction, find the dead converter.
A useful signal flow diagram has just enough information to describe the system, and no more. Aim for these:
What to leave out: rack positions, mains power, every single coupler and adapter. Those belong on the wiring sheet or the rack drawing. The signal flow diagram is about the path the signal takes.
The single biggest readability trick is to lay out your diagram left to right, following the signal. Inputs on the left, mixers and switchers in the middle, outputs on the right.
A typical video chain reads:
Cameras → Switcher → Recorder / Encoder → Stream / Display
A typical audio chain reads:
Mics & DI boxes → Stage box → Front of house desk → Amps / PA
If your diagram is a tangled spider with cables crossing in every direction, you have either tried to fit too much on one page, or the layout is fighting the signal direction. Spread out, use the whole canvas, and let the eye follow the flow naturally.
Different cable types should look different. This is the simplest readability upgrade you can make.
A standard set of colours that crews understand without explanation:
You do not have to follow any particular convention. The key is that you pick one and stick to it across all your plans. The crew learns it, the colours become invisible after a while, and then you can spot a wrong cable type from across the room.
For anything bigger than a single rack, group your gear into zones that match the physical space. Stage left, stage right, control room, front of house, broadcast truck. Draw a coloured box around each one with a clear label.
This is what makes a 40-piece plan readable. Without zones, it is just a wall of boxes. With zones, you can scan to the zone you care about and ignore the rest.
You can draw a signal flow diagram on paper, in Visio, in Lucidchart, in OmniGraffle or in dedicated AV tools. The right one is whichever one your team will actually open and keep up to date.
H2R Gear is built specifically for AV signal flow. Drop gear from the community library, draw cables between them, pick the cable type and colour, group into zones, and you have a diagram that doubles as your packlist and patch list. No double entry.
Once you have a habit of drawing the signal flow before you pack the truck, you will wonder how you ever ran shows without one. The shows themselves get quieter, the load-ins get shorter, and the late-night phone call from a panicked junior tech becomes a much faster fix.
For more on building plans and using zones, see the docs on plan basics.
Ready to get organised?
Start using H2R Gear to plan your next setup.
Get H2R Gear product updates
New features, templates and tips, straight to your inbox.
No spam. Unsubscribe any time.